I wish I had a true before of the upstairs bath, but I don't. I can only tell you that it had lavender walls and Waverly floral rugs & shower curtain. (Update: my sister Lynne emailed me & sent me a lovely before photo. It is below the next photo.) We painted it back in January a neutral beige because we are going to put our house on the market soon. About a month ago we tiled the floor with the same tile as the Master Bath. It was much easier to do this bath than our Master!
Here is the bathroom painted lavender.
Here's what it looked like after we painted.Uhhh, can you say BORING? This was the first room in the house to be BEIGE. So, I knew I had to do something!
Here's the lovely vinyl floor...before the tile.
Here's the tile floor installed. It looks a lot warmer and feels so good on your feet!
I would love to frame out the mirror in a dark painted color, but it would add another project (moving the light fixture down). I also have to find some interesting accessories for the counter. The artwork on the opposite wall is my next project. The frame is going to get a fresh coat of dark paint!
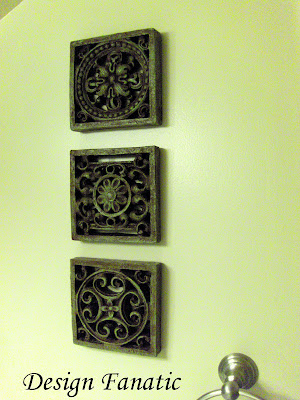
I replaced the gold framed artwork with these faux stone reliefs which were in my hallway. I never really liked them there, so I painted them green & then a brown over it.
Love the cost .... $0
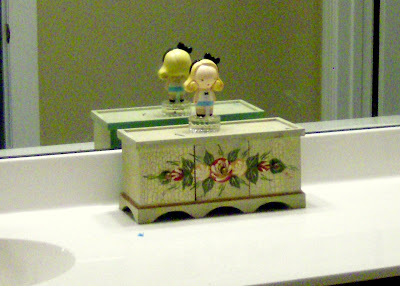
I also painted the little drawers that hold cotton balls & Q-tips. Here's the before:
I think it still needs something. Maybe a different color on the edge and on the little balls on the drawer fronts.


I still have a little work to do in this bath, but it has definitely come a long way!
Hope everyone had a terrific weekend!
Thanks for stopping by,
Pam
Linking up with
Remodelaholic for Remodelaholics Anonymous Meeting
Romantic Home for Show and Tell Friday
Bobbypins Boardwalk for Boardwalk Bragfest
Finesse Your Nest for Shop the House Sunday
Between Naps on the Porch for Metamorphosis Monday
DIY Showoff for DIY Project Parade
It's So Very Cheri for Spotlight Yourself
Domestically Speaking for the Power of Paint Party
Blue Cricket Design for Show and Tell
Room To Inspire for Be Inspired
Shabby Chic Cottage for Transformation Thursday
My Backyard Eden for Make It Yours Day


It looks great Pam!! xo Erica
ReplyDeleteIt looks divine! You are are such a creative one! am loving stopping by! Come join me soon! I would for you to join the postcard exchange! It is always so much fun to see the different states and all the different background everyone comes from! Happy week to you! Anne
ReplyDeleteLooks great. Love the tiles you painted green with the glaze.
ReplyDeleteI love that Pam!! You are good on your painting jobs, always pick great colors!
ReplyDeleteGreat job! I love it! I love the color you chose and all the finishing touches are soooo pretty!
ReplyDeleteEnjoy!
Cathy
So happy to have found your site...look forward to following along!
I like the "faux stone reliefs" done dark because they are sculptural. Interesting sloped ceiling.
ReplyDeleteIt's looking good! I like what you've done in the other rooms too from your photos in the sidebar!
ReplyDeleteI'm a follower.
Dena
Sweet Pickles and Chocolate
So very nice!
ReplyDeletem ^..^
Everything looks great and ready for a house sale!! I particularly like the faux-stone reliefs... your paint treatment made them even nicer!
ReplyDeleteVictoria @ DesignTies
It looks lovely! And the little box is really cute in brown :)
ReplyDeleteOh, and thanks for stopping by!
I think you've done a great job with the bathroom...I love the little box you painted!
ReplyDeleteAlyssa
Lifeoflyssie.com
Your bathroom has come a long way and looks great!
ReplyDeleteI just love seeing before and after photos, thanks for sharing them.:)
Love the new upstyle look, and the combo of the urn and the 3 painted plaques is very pretty. Love the brown over the green paint treatment.
ReplyDeleteI love the tile!
ReplyDeleteThe little drawer thingie looks alot better painted!!
ReplyDeleteYour remodel look lovely! I like all the new coats of paint it really freshened everything up.
ReplyDeleteooooo, great job! i concur, the tile and drawer guy turned out awesome :)
ReplyDeleteI love scroll work. it looks really good.
ReplyDeleteLooking good! I'm glad I'm not the only one that will paint anything!! :)
ReplyDeleteThank you for linking to the Boardwalk Bragfest. Would you mind putting a link back to my party on your post above? Thanks!
ReplyDeleteWow, your bathroom looks ah-mazing!! Love it!!! I'm having a link party tomorrow if you'd like to show it off there as well.
ReplyDeleteI think it looks great - and painting existing pieces is my kind of decorating! Thanks for linking up to Be Inspired today.
ReplyDeleteChelsea
Thank you for sharing! Great pieces that turned out perfect for your space!
ReplyDeleteSo much better! I love that you used items you already had in your house.
ReplyDeleteThanks for sharing at My Backyard Eden!
very nice makeover! love how it turn out! look so great!
ReplyDeleteGreat makeover! The painted faux stone is a great embellishment. Maybe you could use a very thin frame around the mirror and incorporate the light fixture into it? Its looks pretty good as is though!!
ReplyDeleteThe makeover is great. I don't know if you would be interested but, you could always put a frame around your mirror and hang another mirror over the one that you have. 2 round mirrors maybe??? Very simple and big impact. Just a thought!
ReplyDeleteLooks great! Thanks for sharing at the POPP.
ReplyDeleteI love the relics you've moved from the hall, and the tile looks fantastic!
ReplyDeleteWow! It looks fantastic, great job. I'm here from Santa's Blog Hop albeit a little late but I'm your newest follower. Hope you'll visit my blog and follow me too? Thanks!
ReplyDeletehttp://darkmoneyside.blogspot.com/
Wow! Everything looks great. I love how you painted that little box. What a difference! I saw a project you might try with your mirror (and for the life of me, can't remember what blog!) They took empty picture frames and used liquid nails to adhere them directly to the mirror. It doesn't frame out the mirror on the edges, but just sits right on top. You could do 2 side by side or just one under your light fixture. You might go pick up an empty frame at Goodwill or Hobby Lobby and use poster putty to "mock up" the look on your mirror to see if I'm crazy or not! Good luck and thanks for linking up to Shop The House Sunday!
ReplyDeleteLovely...it looks great!
ReplyDelete