Monday, October 23, 2023

Mountain Cottage Bathroom Update


*this post contains affiliate links


Thought I'd give everyone an update of the progress of the mountain cottage en suite bathroom.
If you recall, I put together an inspiration board way back in the planning stage. Most of the fixtures have been purchased. The only thing different are the lights and the Shaker door has a horizontal rail. 
mountain cottage, bathroom update, porch makeover, diy
As of Sept 30th, we're  happy to say that Mr. DIY has finished all the framing, rough electrical, rough plumbing and insulation and has passed all of those inspections.

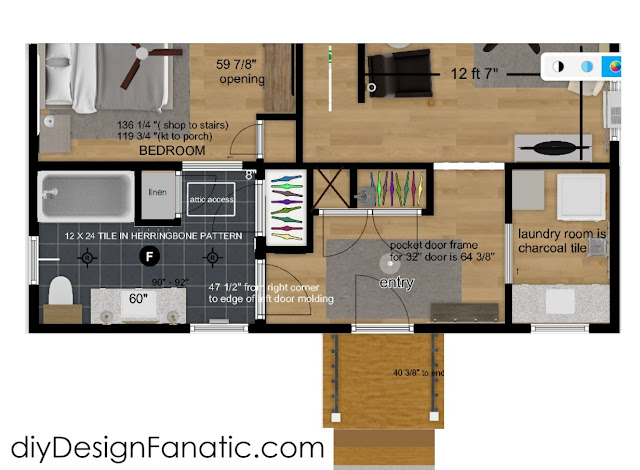
The bathroom currently looks like this:

mountain cottage, bathroom update, porch makeover, diy


mountain cottage, bathroom update, porch makeover, diy


mountain cottage, bathroom update, porch makeover, diy

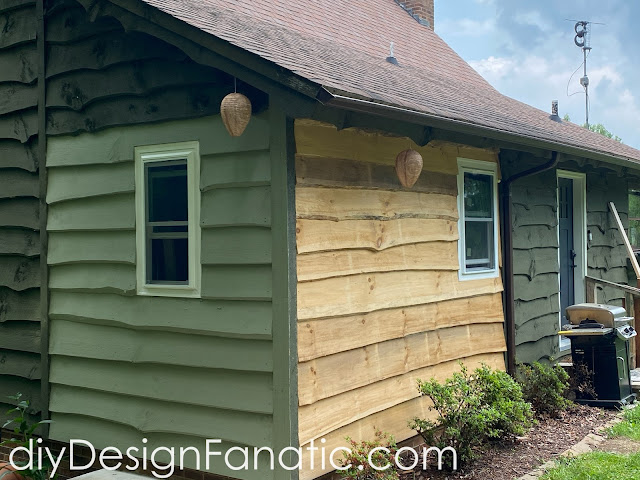
The red door used to be the front entry door on the porch.

mountain cottage, bathroom update, porch makeover, diy


Just so you understand the layout, I've included a top view
mountain cottage, bathroom update, porch makeover, diy
Here are a couple of perspective renderings.
mountain cottage, bathroom update, porch makeover, diy


mountain cottage, bathroom update, porch makeover, diy

Now that all the inspections have been passed, Mr. DIY can start on finishing work: the flooring, drywall, install 3 doors, the vanity, toilet, lighting, heater, tile on the bath surround. Of course, that will be after Christmas and New Years....There's lots of Fall cleanup and chores to do. 

And, of course, I'm looking ahead to having the whole front third of the mountain cottage plan. The old bathroom will now become the laundry room and a new closet will be built in the foyer. This house will finally have the storage it needs. I'm not sure how the previous owners could live here full time with no linen closets and very little storage. 
mountain cottage, bathroom update, porch makeover, diy

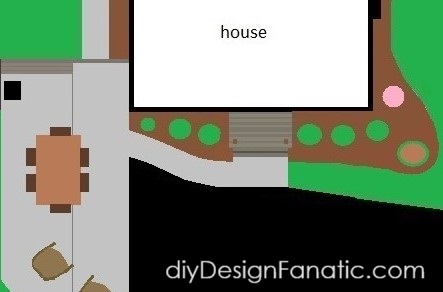
We're also planning on having some concrete work done...
mountain cottage, bathroom update, porch makeover, diy

The new siding has been Zinssered and painted to match the house. One of these days, we'll choose a new color and repaint the whole cottage...and plant some new landscaping.
mountain cottage, bathroom update, porch makeover, diy

Now you're up to date on the Mountain Cottage bathroom project.
Thanks for stopping by,

Pam


*this post contains affiliate links which means I'll make a small commission should you click on the link and purchase something.

Wednesday, October 18, 2023

A Fairy Garden for our Granddaughter

 *this post contains affiliate links...


Several months ago, our daughter posted some photos of a family visit to a local spot in SoCal that had a fairy garden, that our granddaughter loved. That gave me the idea to put together a fairy garden at our house for when she came to visit. 
Of course, I started gathering inspiration for the fairy garden on Pinterest. You can find my Fairy Garden board HERE.
I also started gathering cute supplies on my Amazon Influencer's page. You can find it HERE. You can also see the Fairy Garden supplies I bought from Amazon BELOW.
I also found some cute things on Etsy, Factory Direct Craft . com and Hobby Lobby. 
And, of course, Mr. DIY made a few things.

fairy garden, miniatures, diy fairy garden, magical fairy garden


I first purchased a bird house, but it was too small, so I had Mr. DIY build a larger house out of scrap wood he had leftover from his many projects. I had him paint it with the same outdoor paint as our front door. I cut some moss mat to size and then added loose moss over that. Then, came the windows.
The door is from Hobby Lobby and it's not attached.


fairy garden, miniatures, diy fairy garden, magical fairy garden


fairy garden, miniatures, diy fairy garden, magical fairy garden

I used Sculpey clay for the bases of the signs. I formed the base, stuck the sign in to make a hold, then baked it according to directions. Once the clay was cooled, I glued the sign in the hole.

fairy garden, miniatures, diy fairy garden, magical fairy garden


I did the same for the lollypops...
fairy garden, miniatures, diy fairy garden, magical fairy garden


...and the mushrooms.
fairy garden, miniatures, diy fairy garden, magical fairy garden

Mr. DIY made the trays out of some scrap wood and I applied moss mat to it. The moss mat has a slightly sticky back to it.
fairy garden, miniatures, diy fairy garden, magical fairy garden


One tray wasn't enough, so I had Mr. DIY make a second tray. I used two of the many wood rounds we had from a tree we cut down at our mountain house. The wood rounds had previously been used to hold the centerpieces at our daughter's friend's wedding. 
fairy garden, miniatures, diy fairy garden, magical fairy garden

I found the bridge on the Hobby Lobby website.


fairy garden, miniatures, diy fairy garden, magical fairy garden

Instead of putting the Fairy Garden outside, I thought the fireplace hearth was the perfect place for it, just in case it rained or was too hot or the bugs were out. 
fairy garden, miniatures, diy fairy garden, magical fairy garden

Of course she loved it and has spent many hours playing with it rearranging it how she likes. 
I had a lot of fun too putting it all together. 

Thanks for stopping by,

Pam


Fairy Garden supplies found on Amazon:


 *this post contains affiliate links...which means I'll make a small commission should you click on the link and purchase something.